
Yoga Chair DIY
 Yoga chairs can be an expensive investment! So, instead of buying yoga chairs for $70 each, I followed a tutorial on YouTube, and transformed ordinary folding chairs into backless yoga chairs that Iyengar himself would be proud of.
Here's what you will need:
- Folding chairs. I used these...they are really sturdy, and come in beige, silver or black!
- Gloves. I didn't have leather gloves like the man in the video, but used some thick gardening gloves.
- Pliers or vice grips. Amazon sells all sorts of them here or here.
- Large screwdriver. It needs to be super-sturdy...you will use this the most to pry the backs off.
- File or Dremel. My husband had a Dremel with an attachment that sands metal...so I saved a TON of time/arm strength using it! If you don't have one, this kind of file should work.
- Athletic tape or spray paint. I opted for athletic tape...thought the grip would be nice to have around the top of the chair. And, it is SO humid here in Florida, that I thought it might take WEEKS to dry.
Here's what to do!:
Use your pliers or vice grips, grab the lower edge of the chair back, and pull it away and back from the tube. Do this on both sides.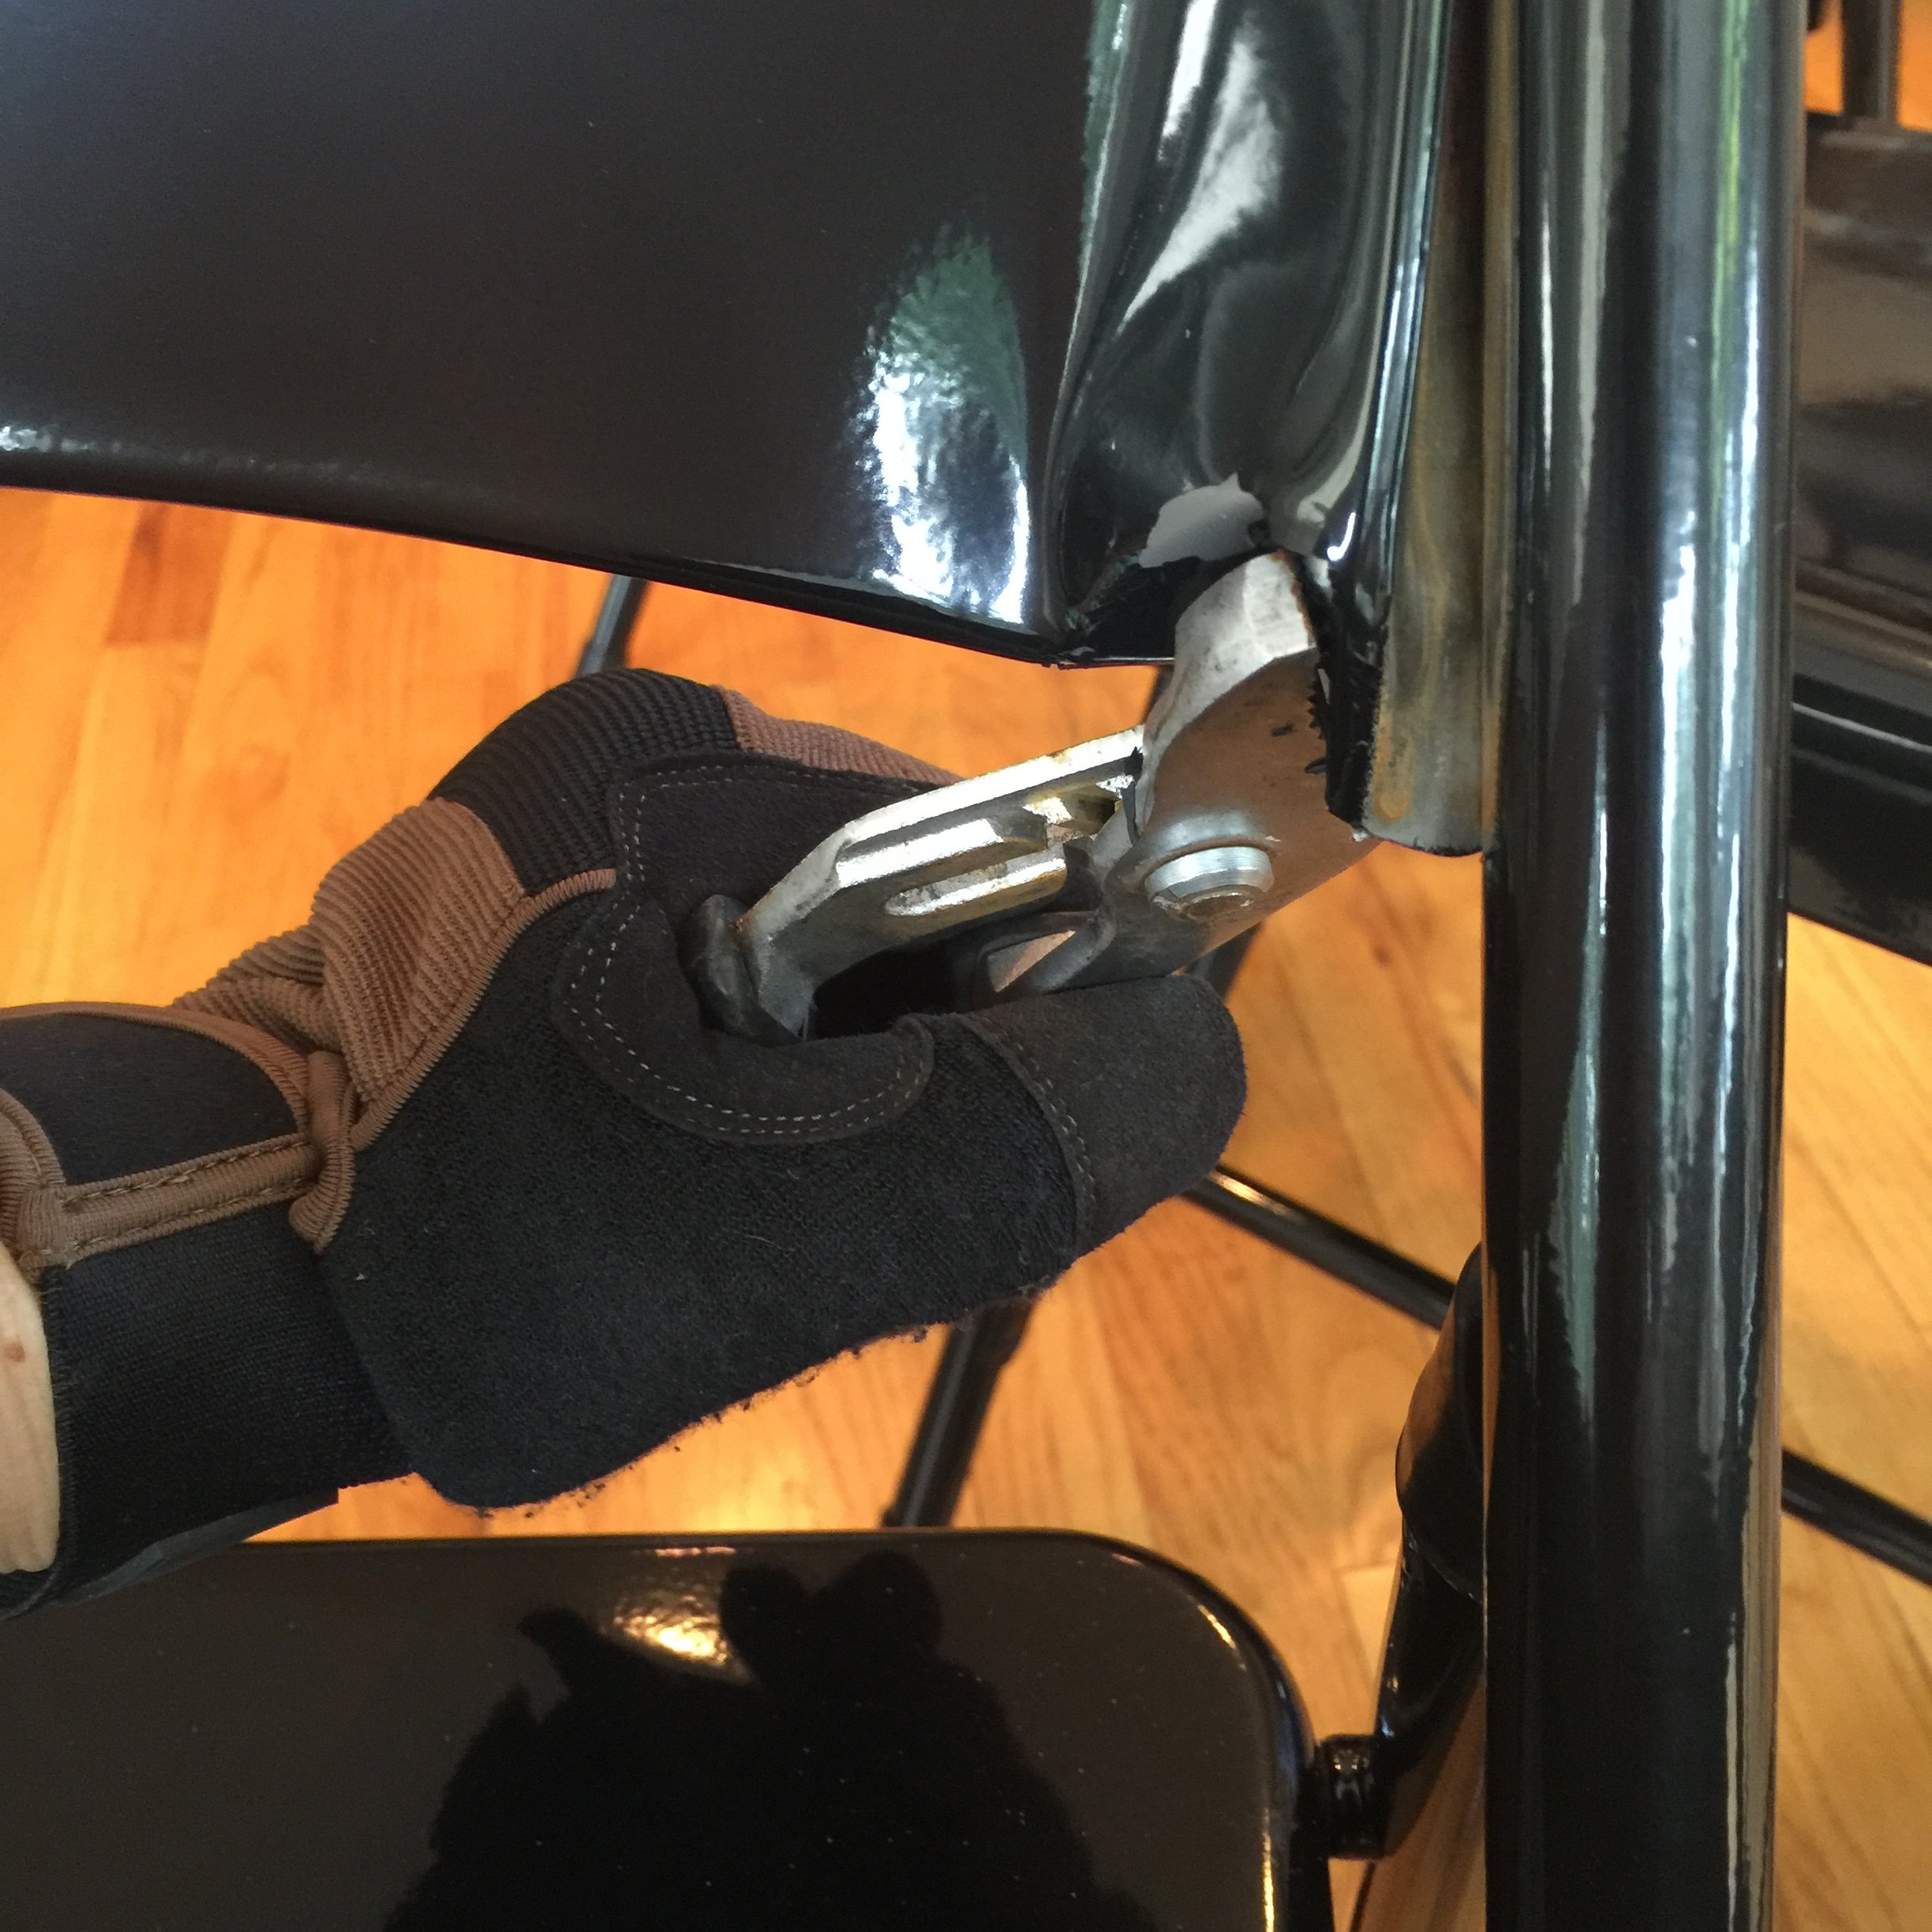 This takes a bit of strength!!Next, using your screwdriver, wedge it between the tube and the chair back. Rock the screwdriver back and forth until you see the light of day...
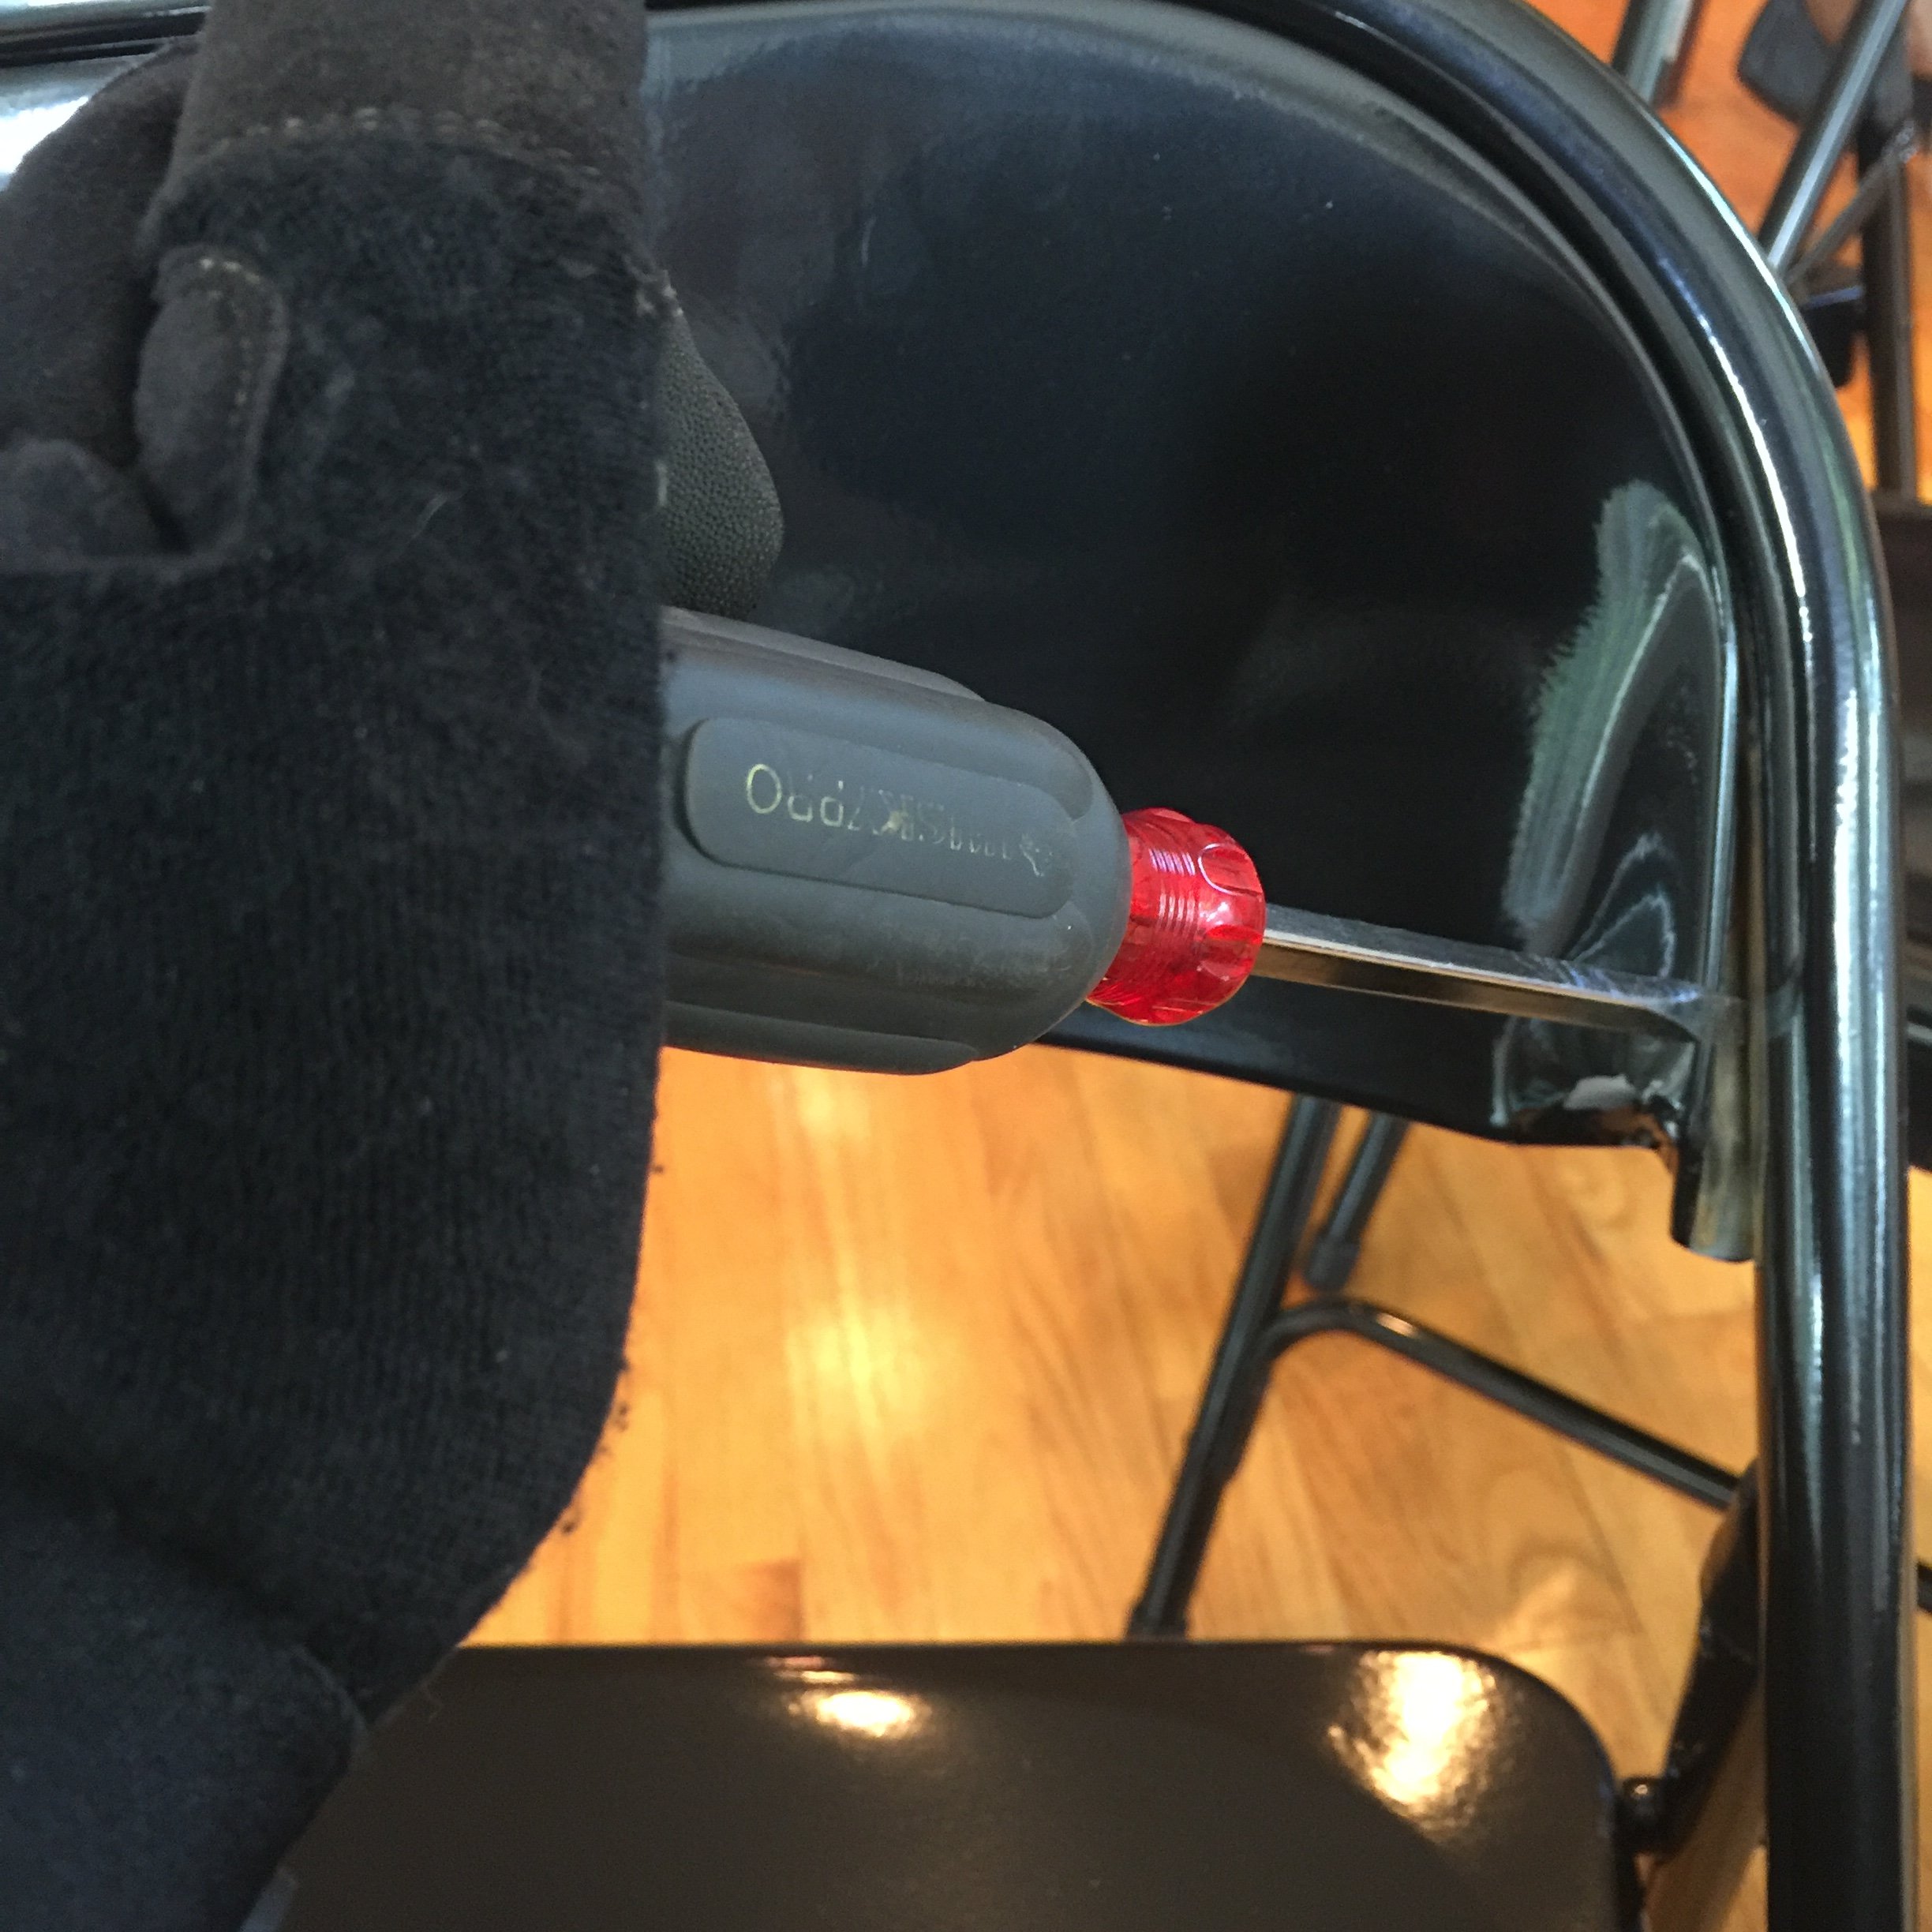
 Make sure to have a vacuum handy...there is a lot of paint chipping off!Keep wedging and wiggling your screwdriver in, and then all around the edge of the chair back...you will hear loud "POPS" when the welds break.
 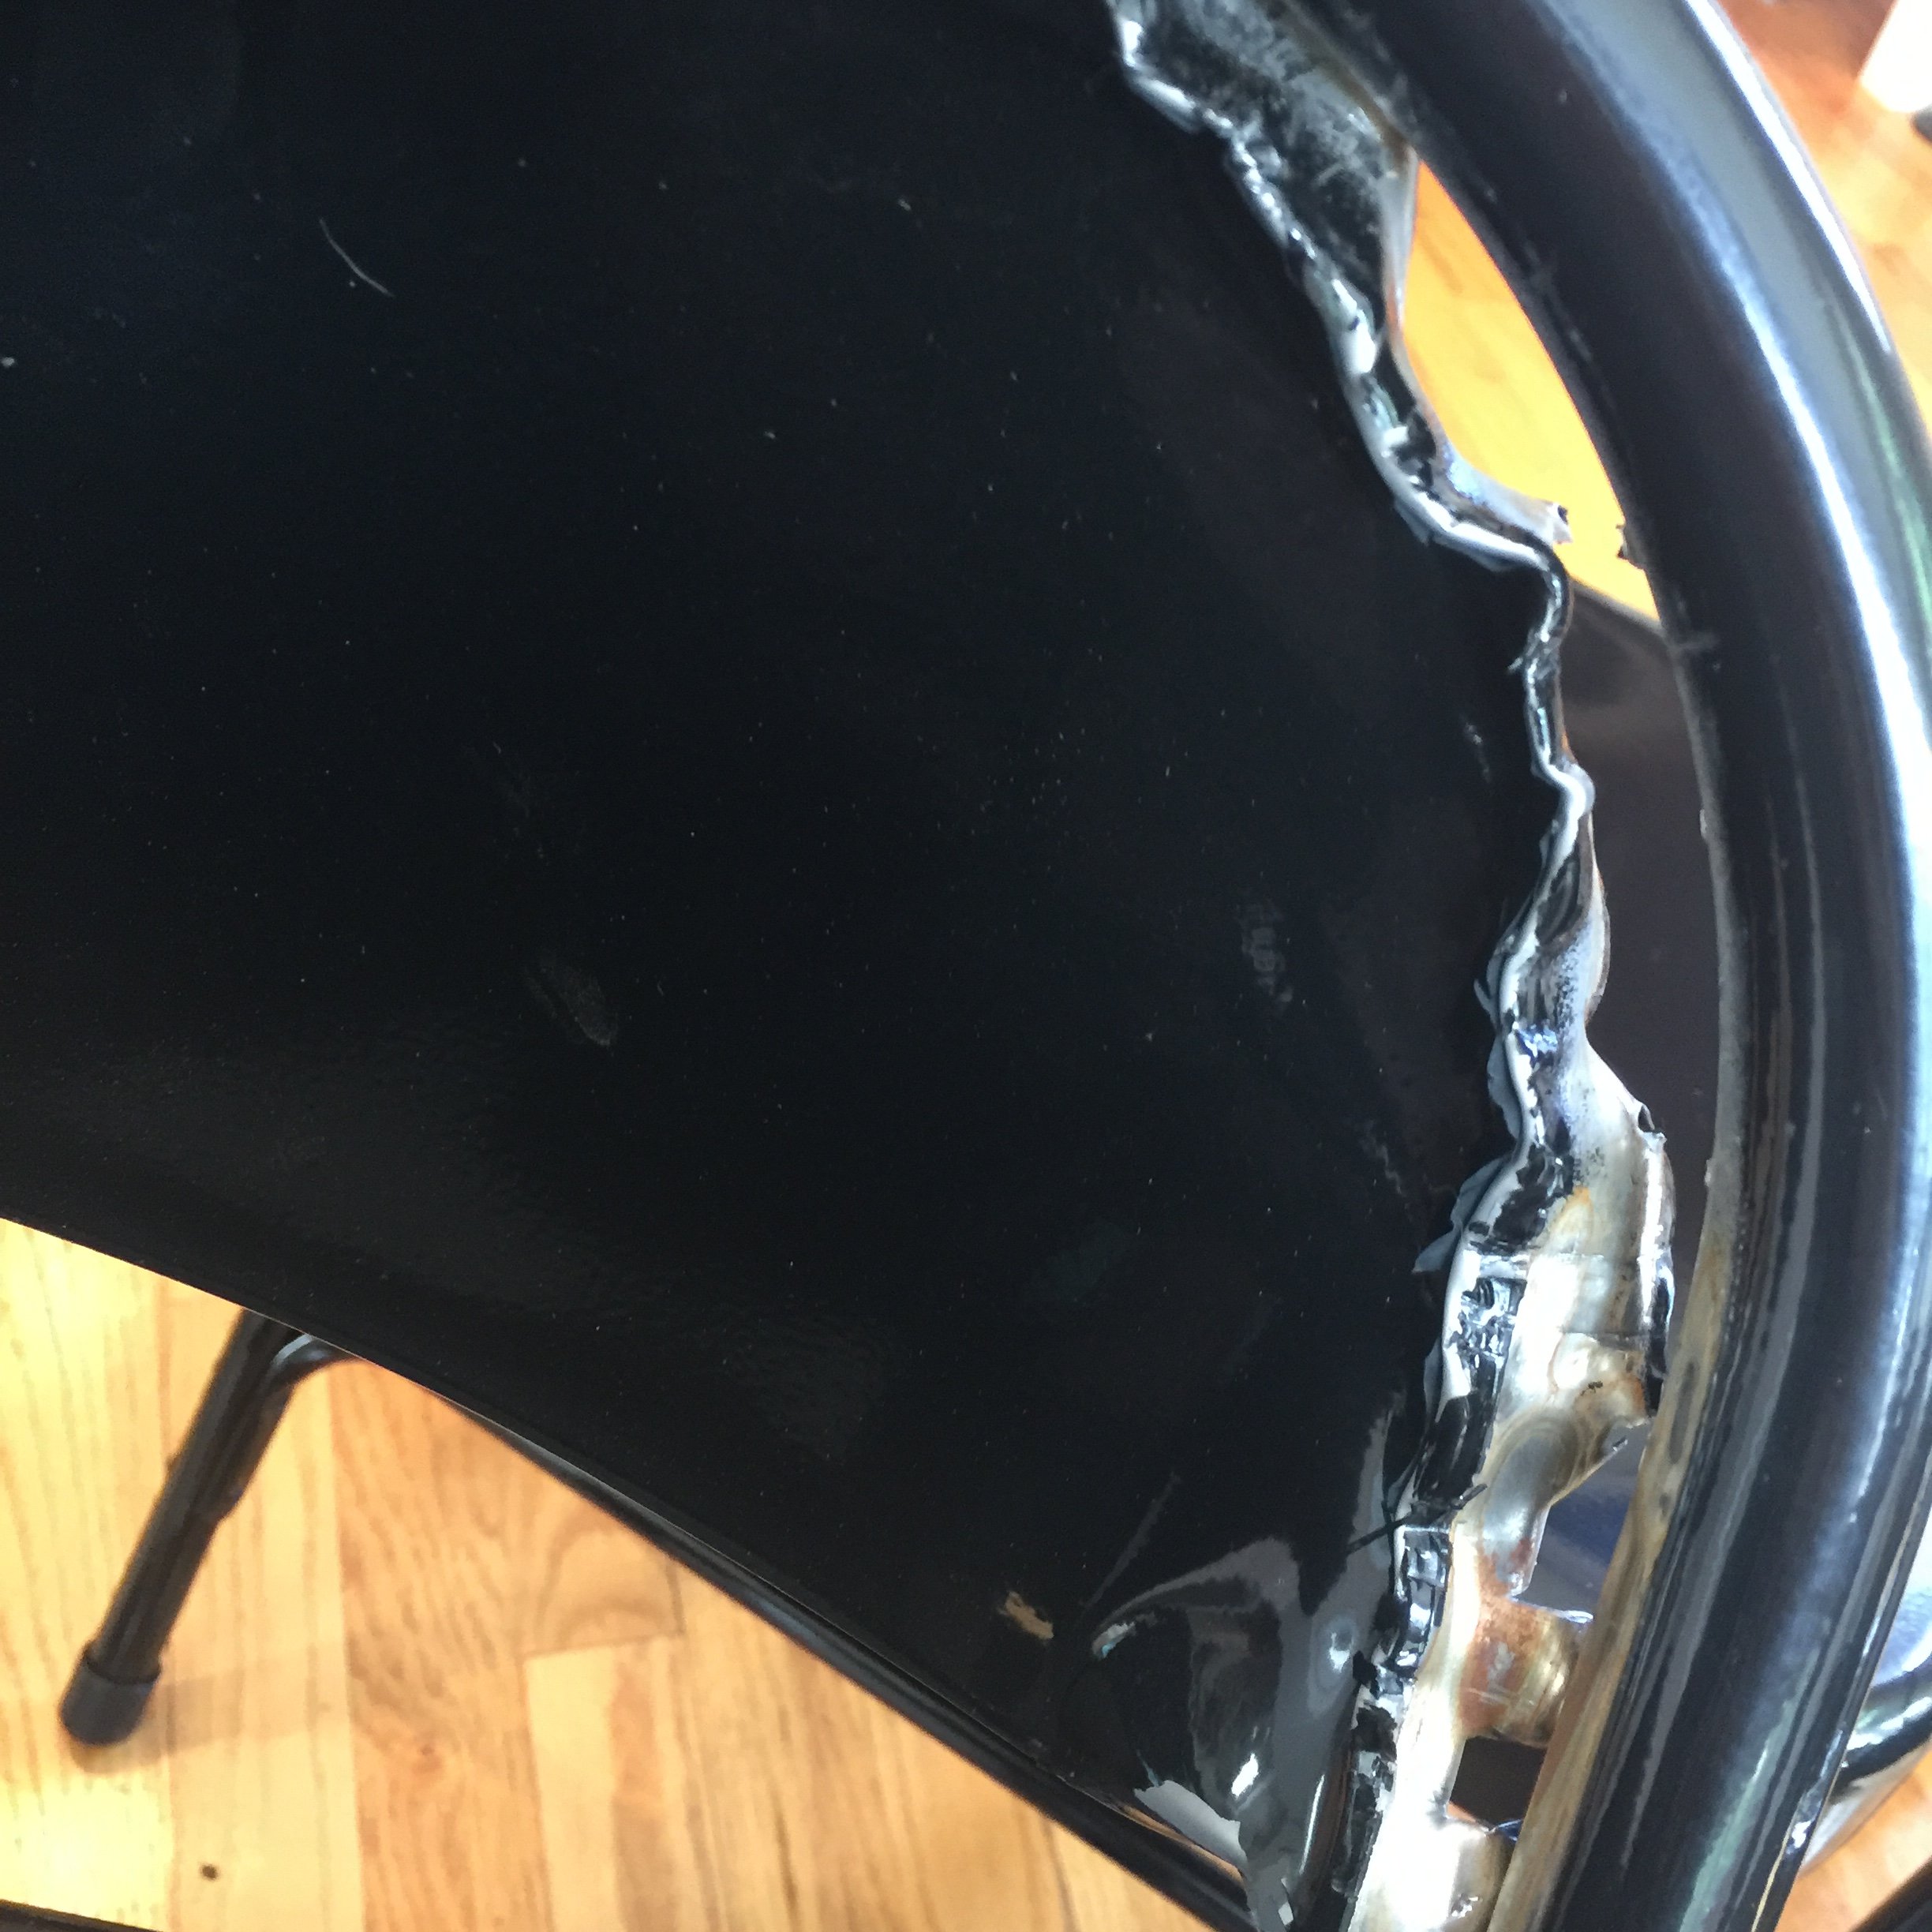 some are MUCH easier to remove than others! I may or may not have cussed all the way through the chair below:
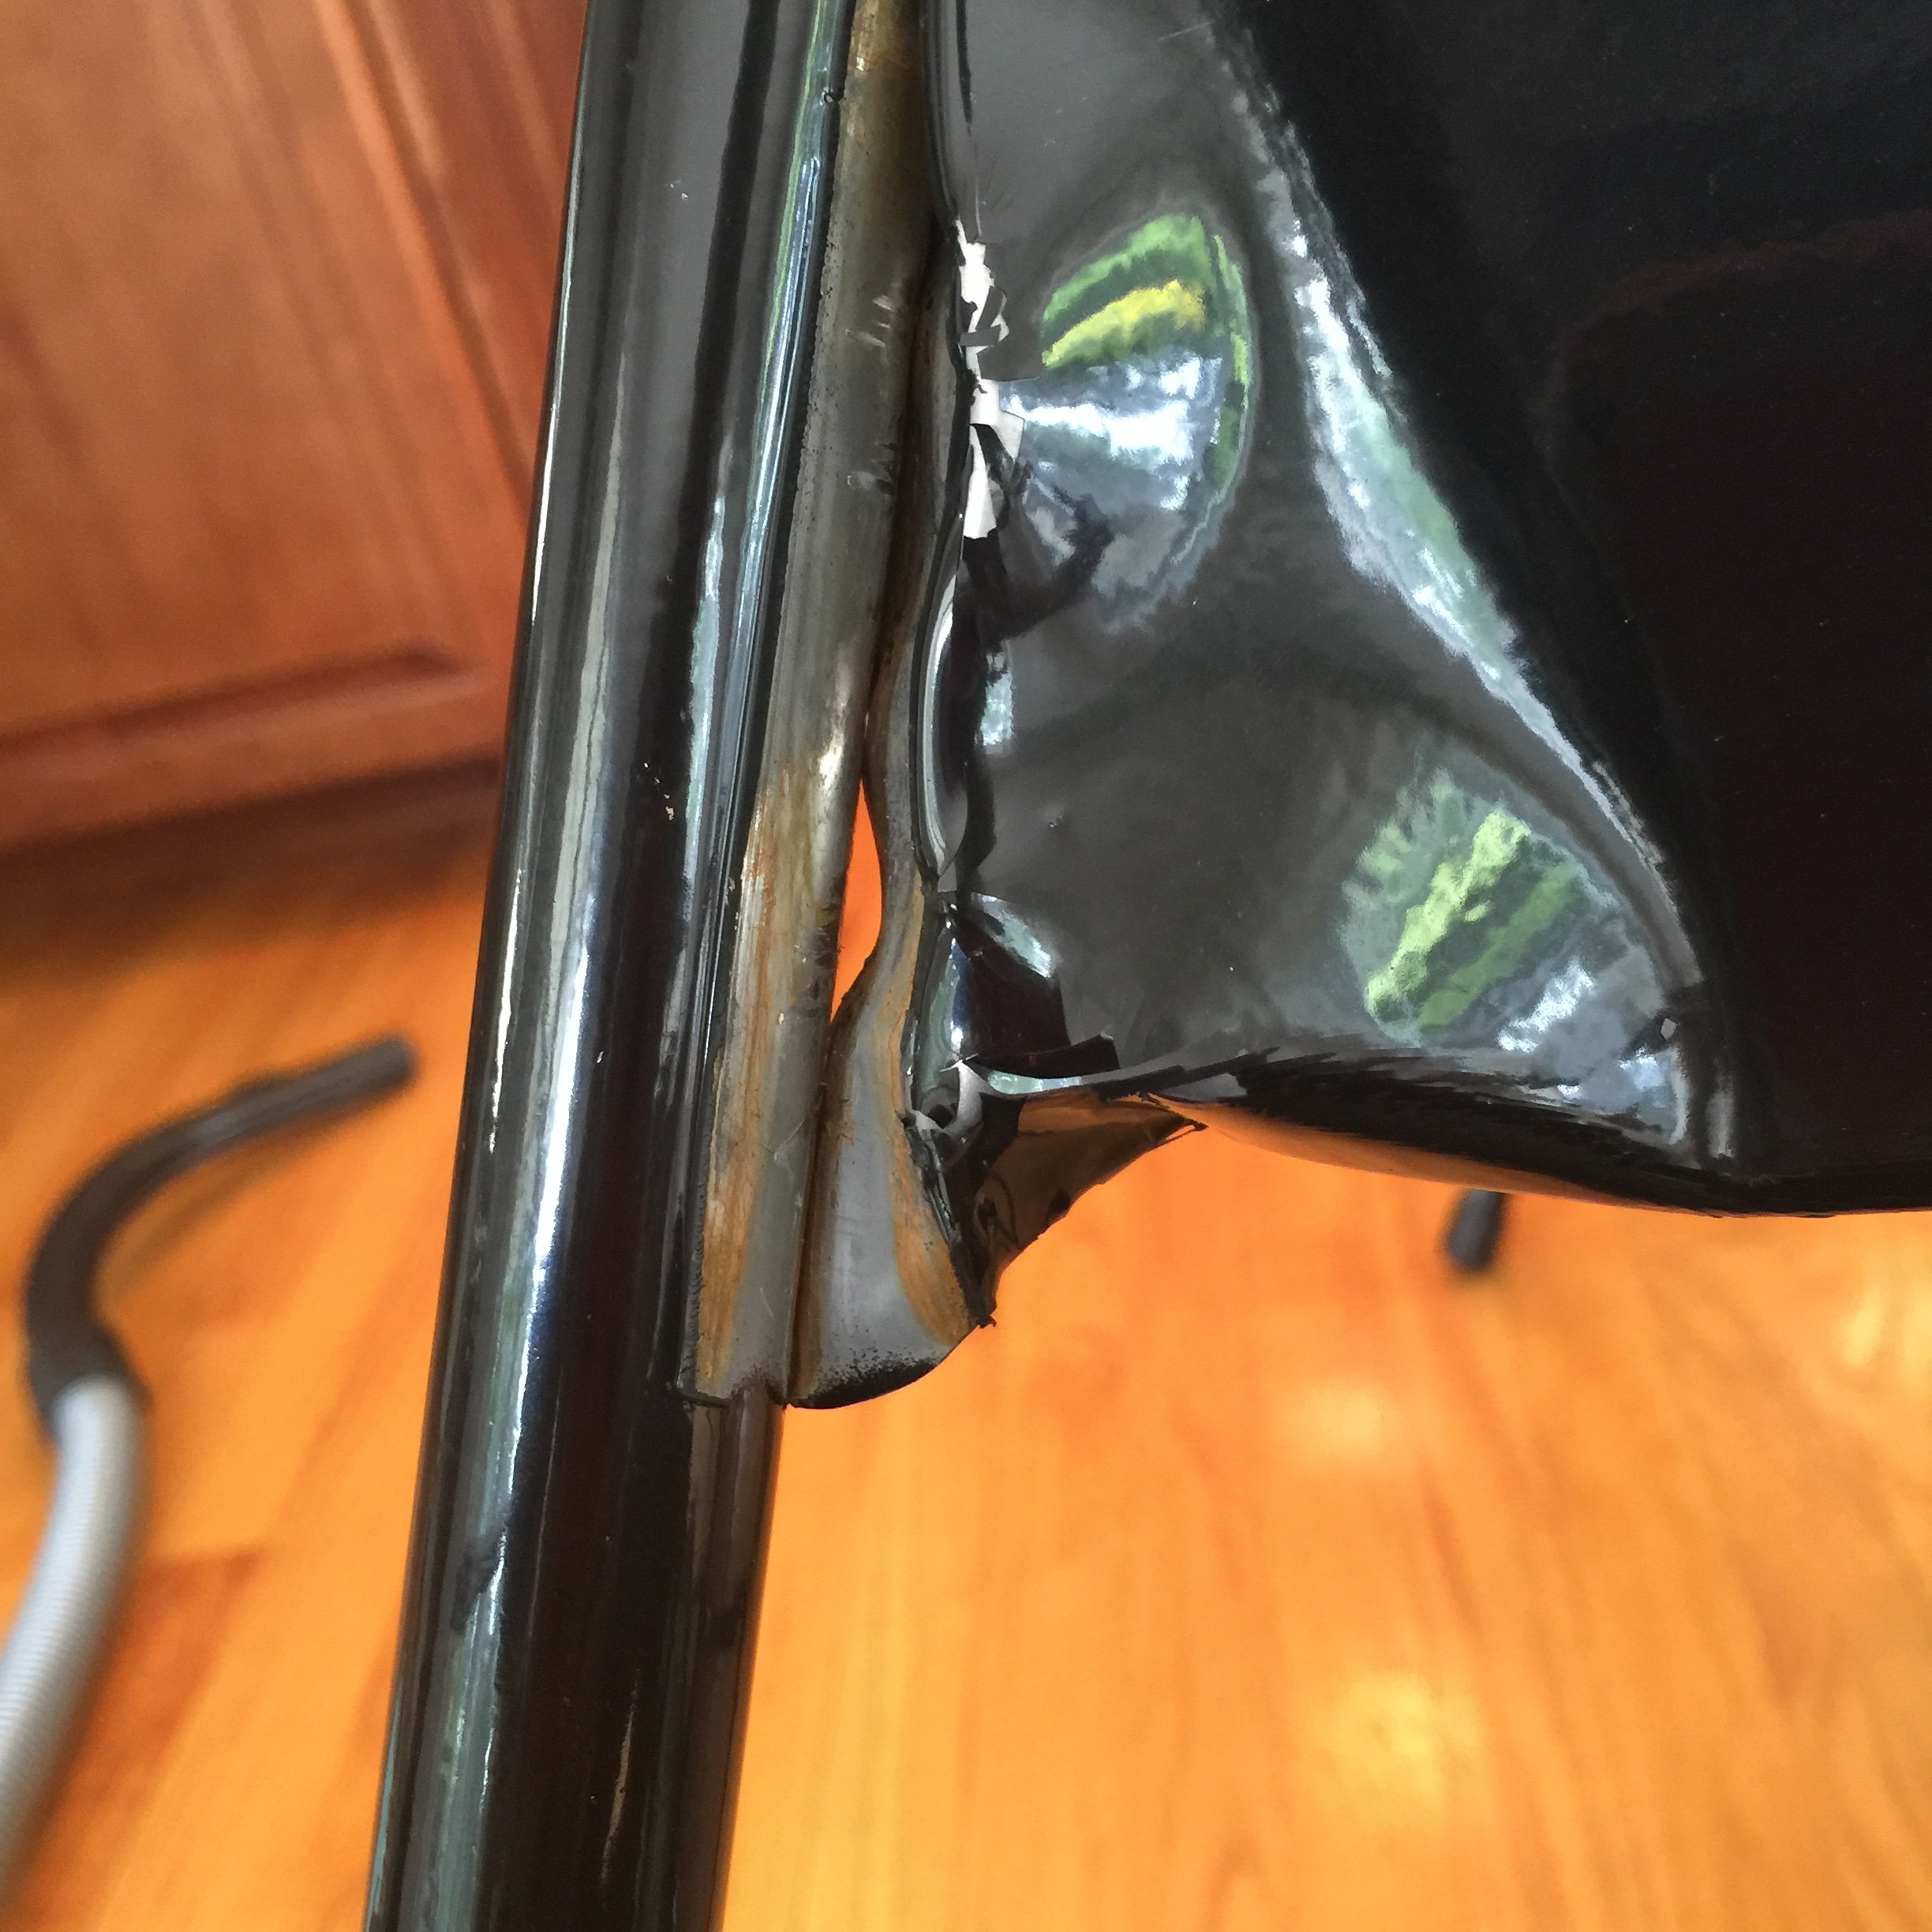
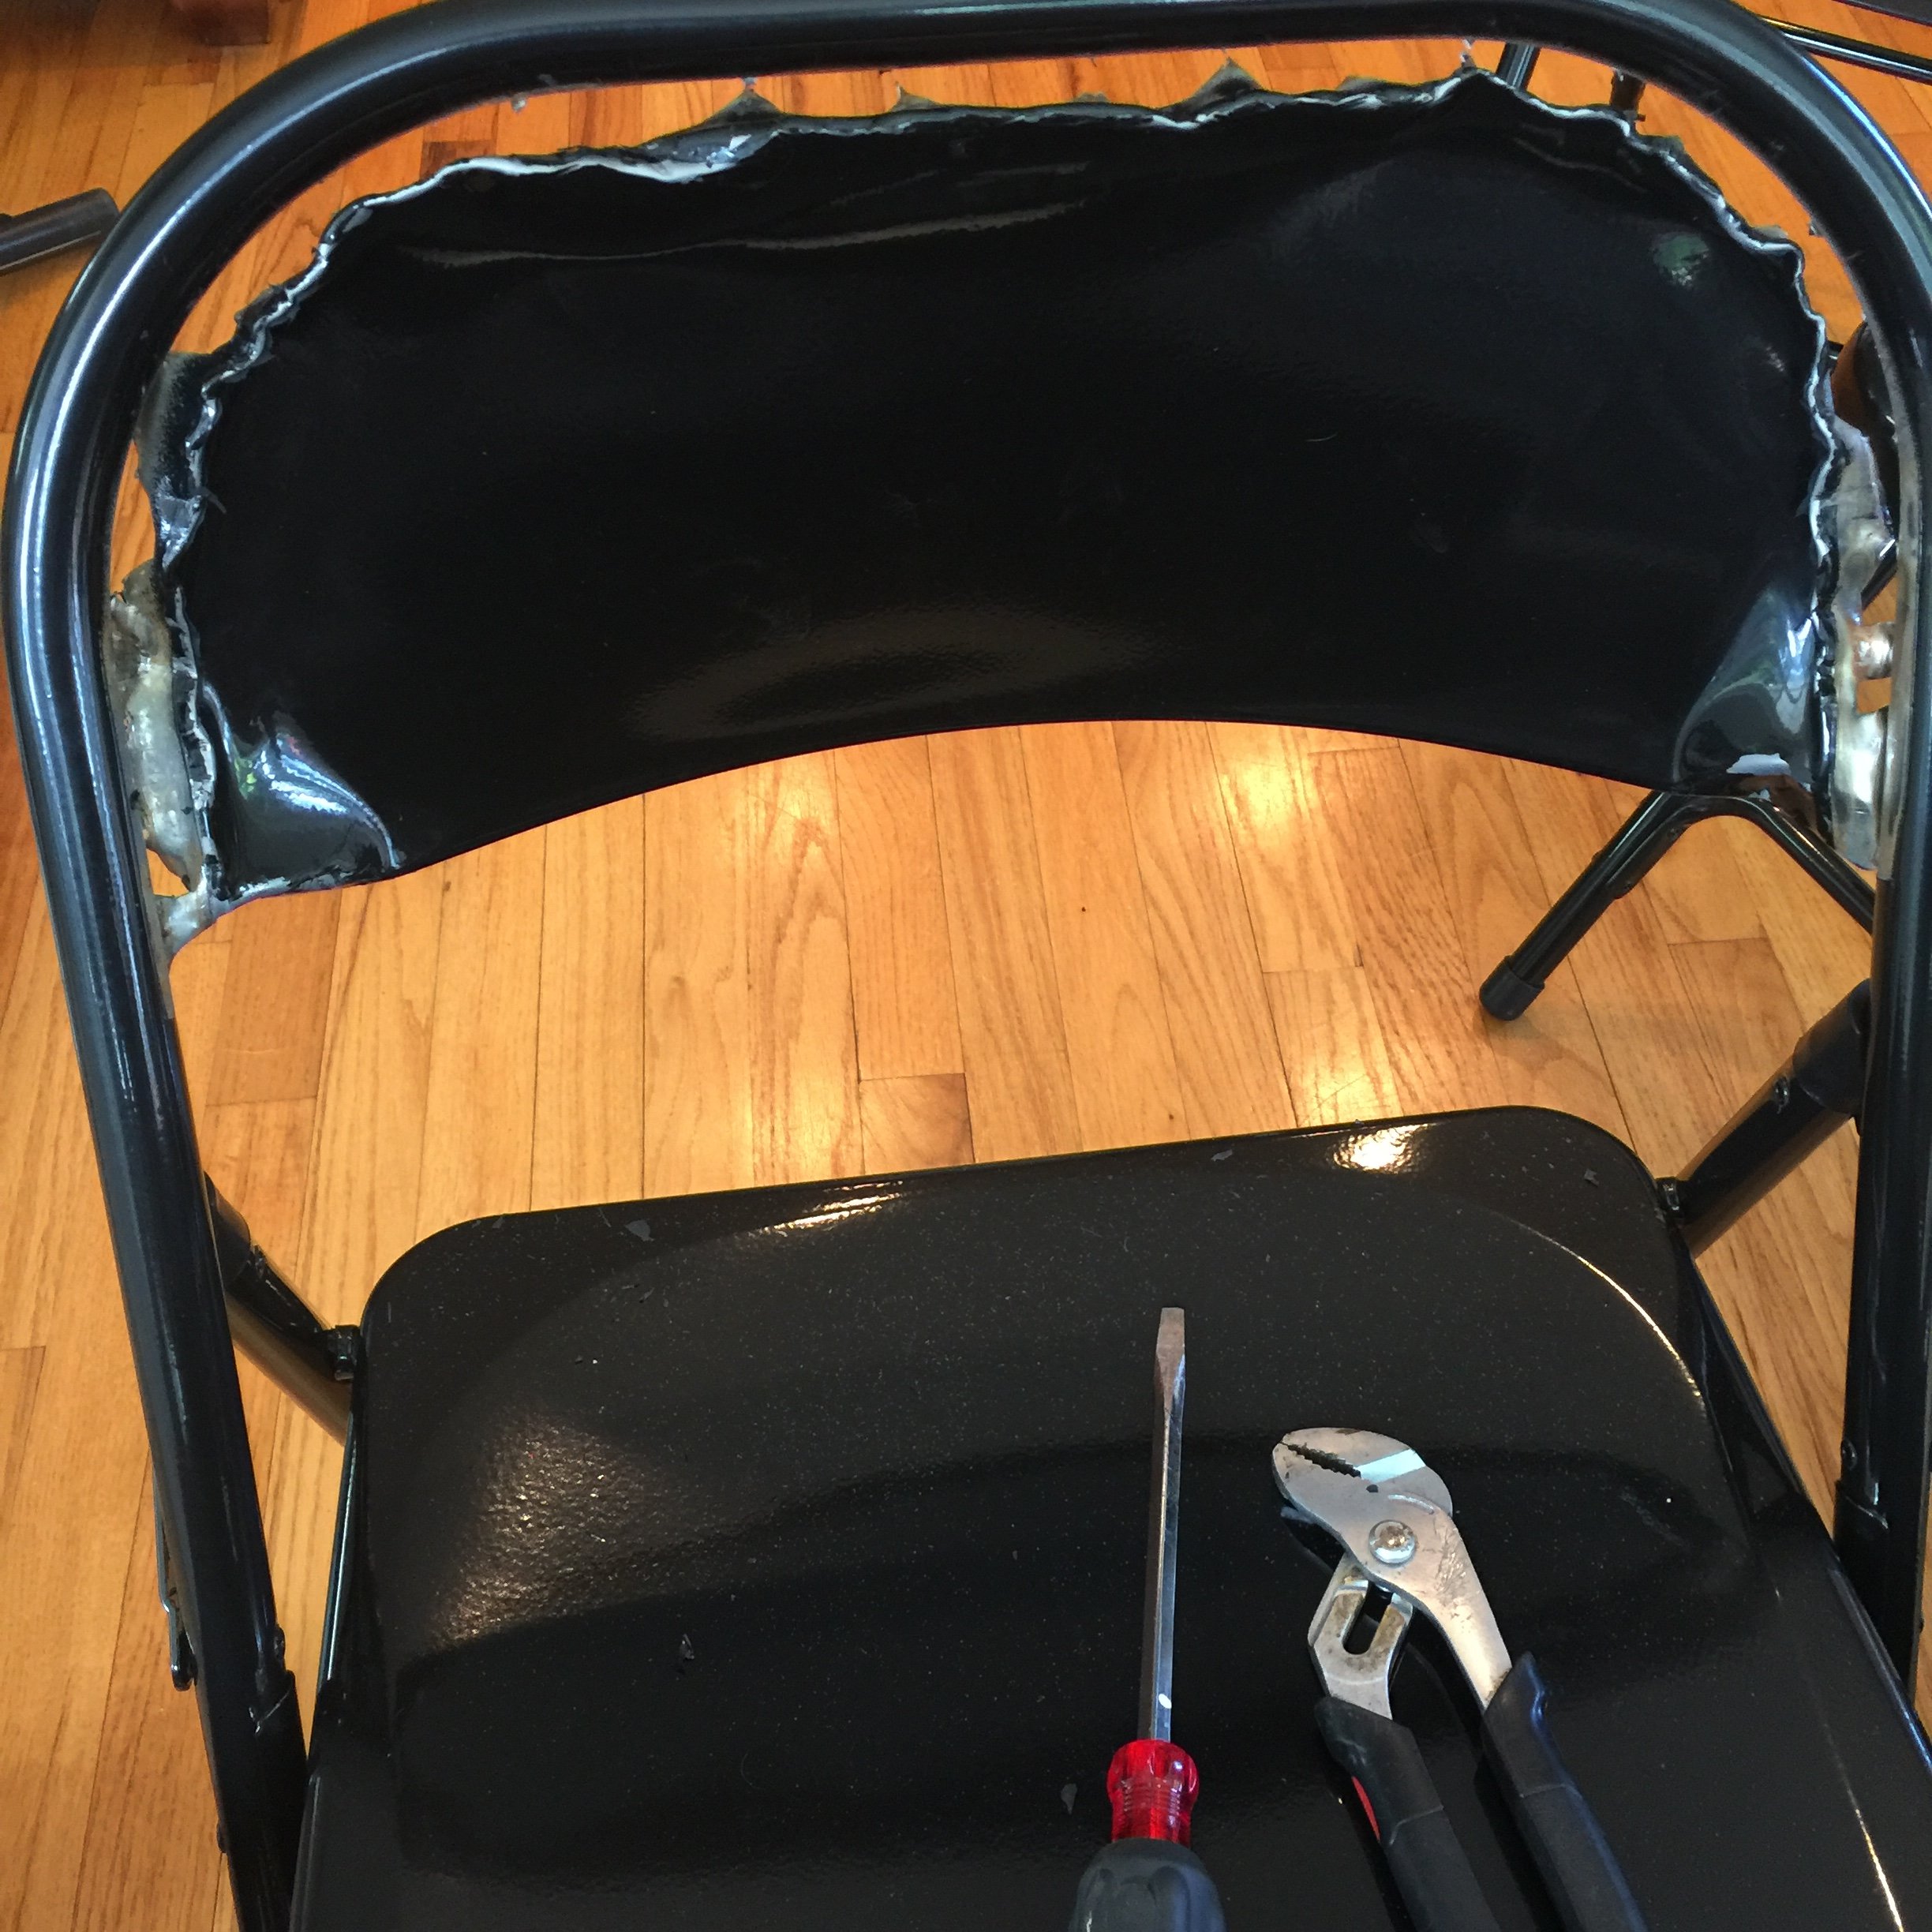 Once you take off the backs, there are super-sharp parts all along the tube (where the tube was welded to the back) that need to be filed down.
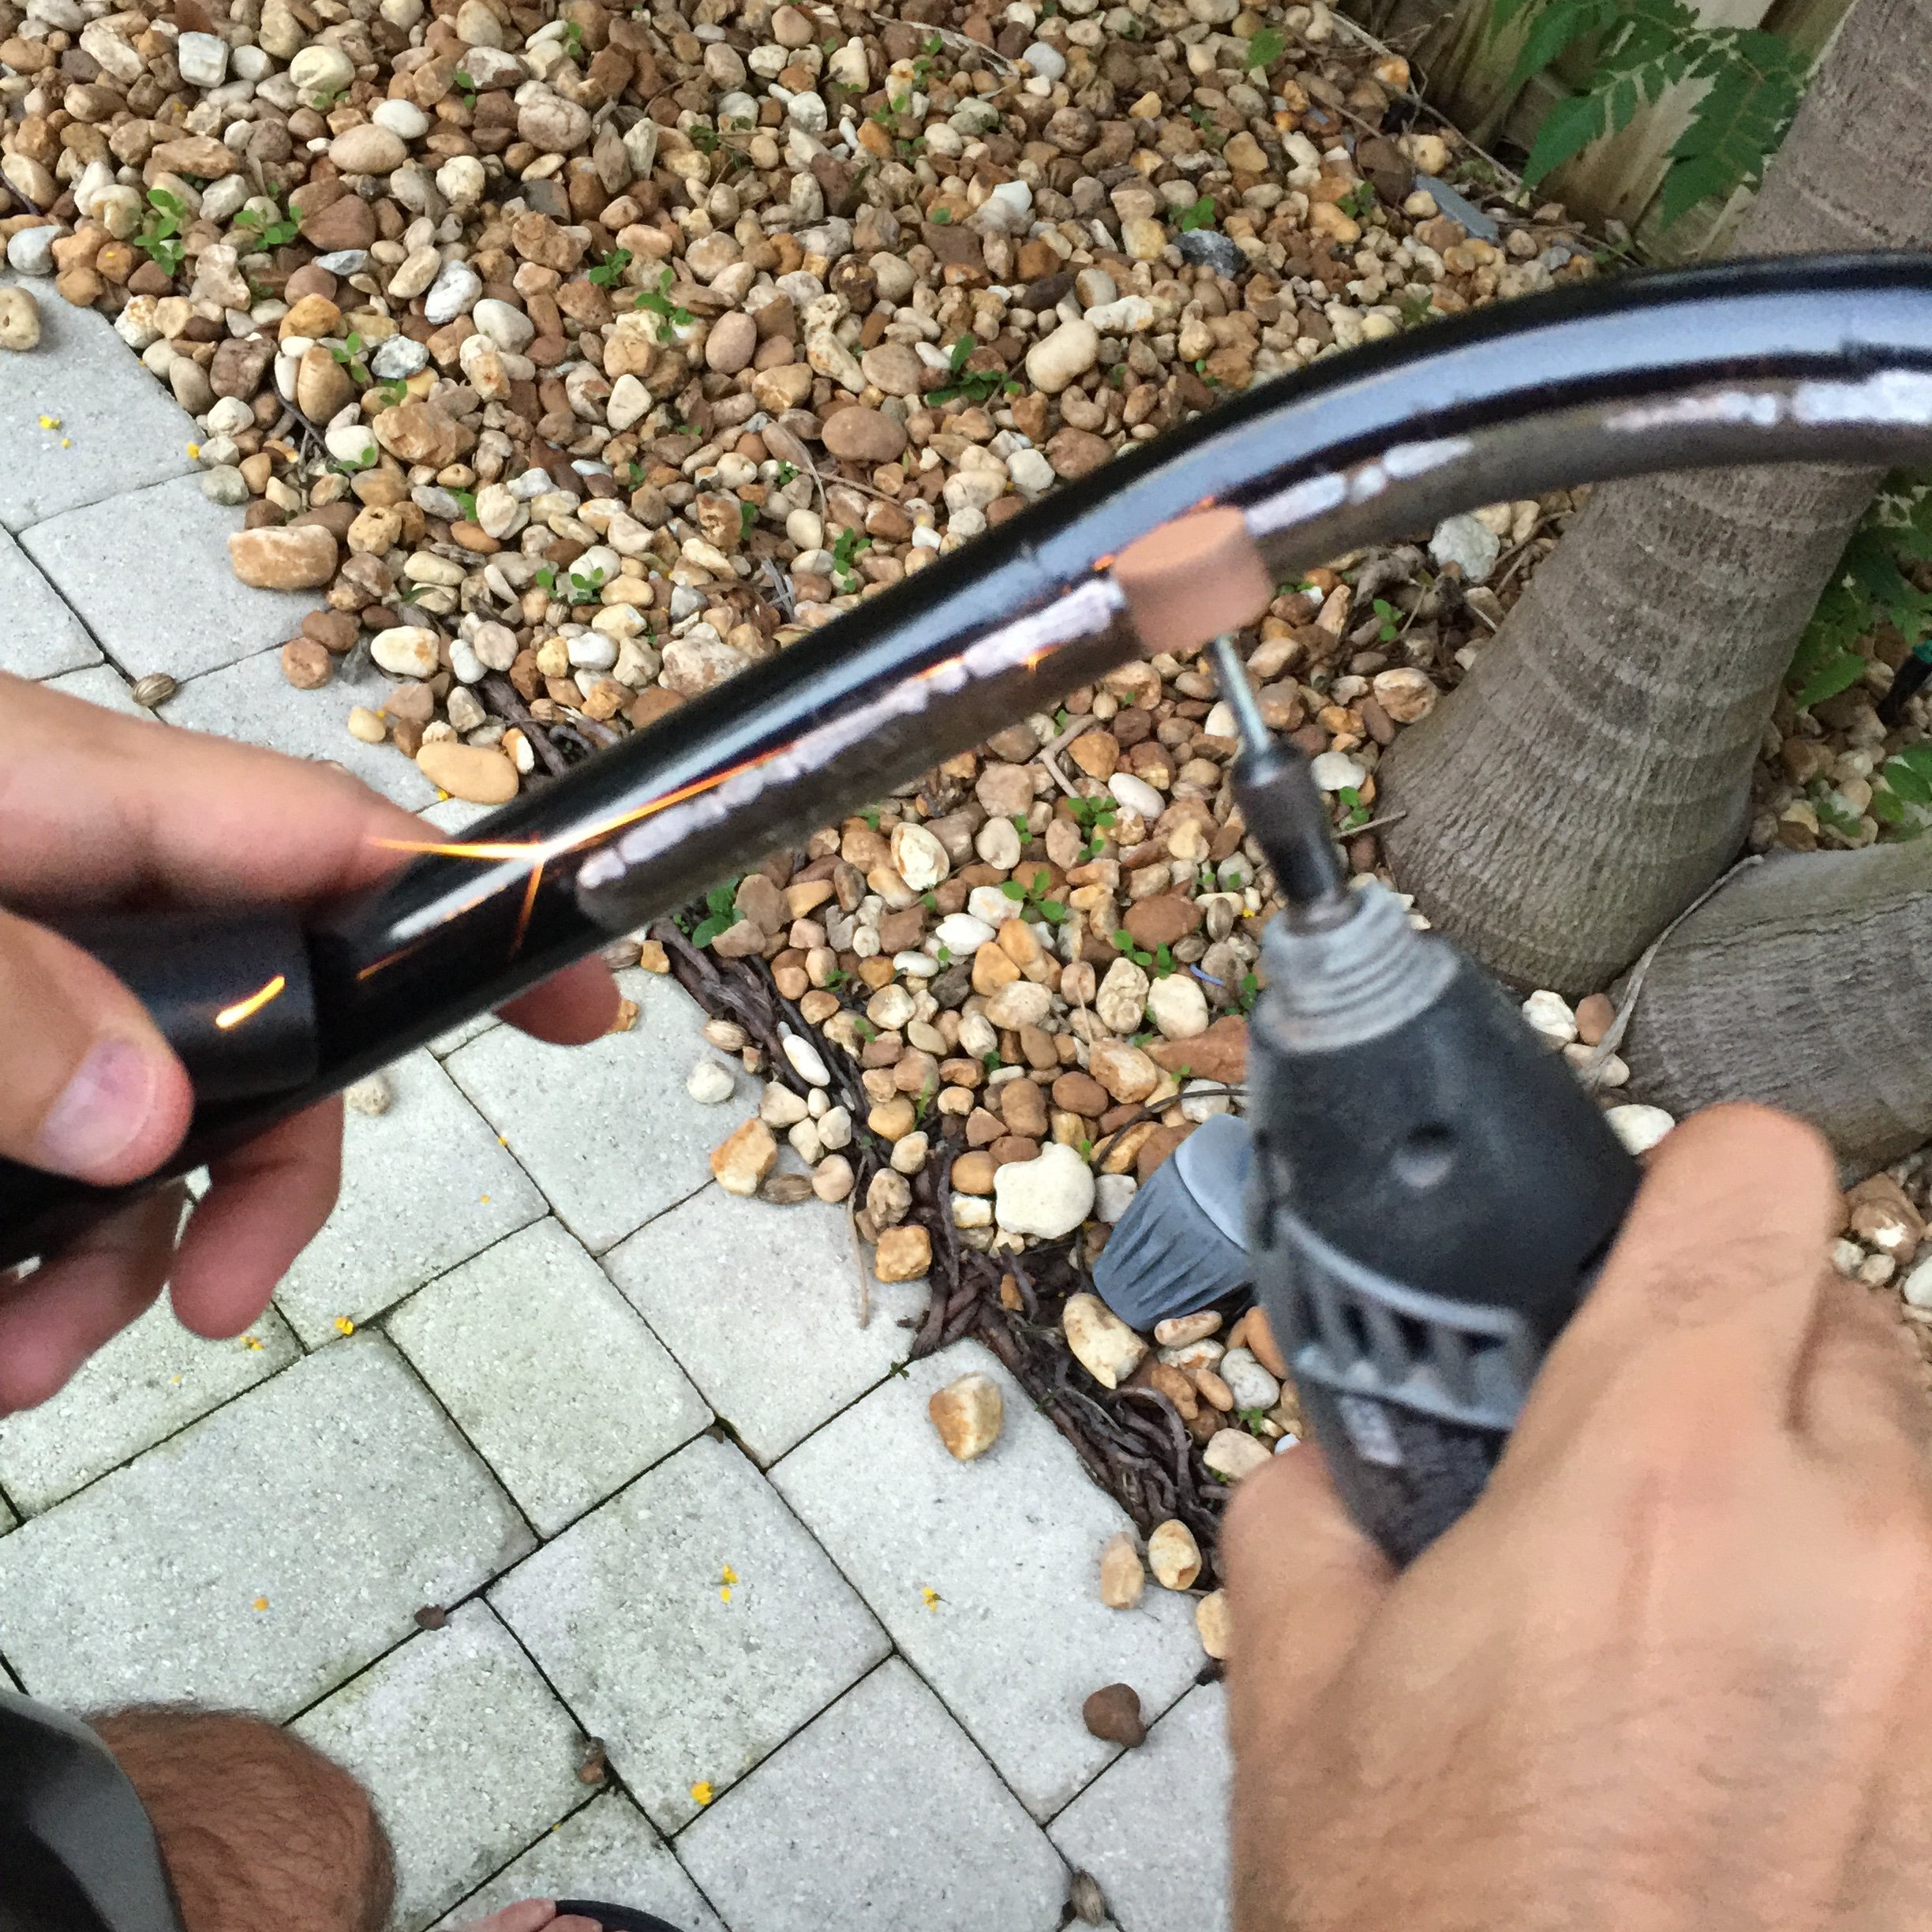 My husband was nice enough to do some of the sanding for me...(lots of sparks!!). If you have long hair like I do...PULL IT INTO A PONYTAIL if you Dremel. Be safe people. Oh, and this is DEFINITELY an outside job.Once the backs have been sanded and feel smooth to the touch, then take your athletic tape, and wrap it around the tube in the back.
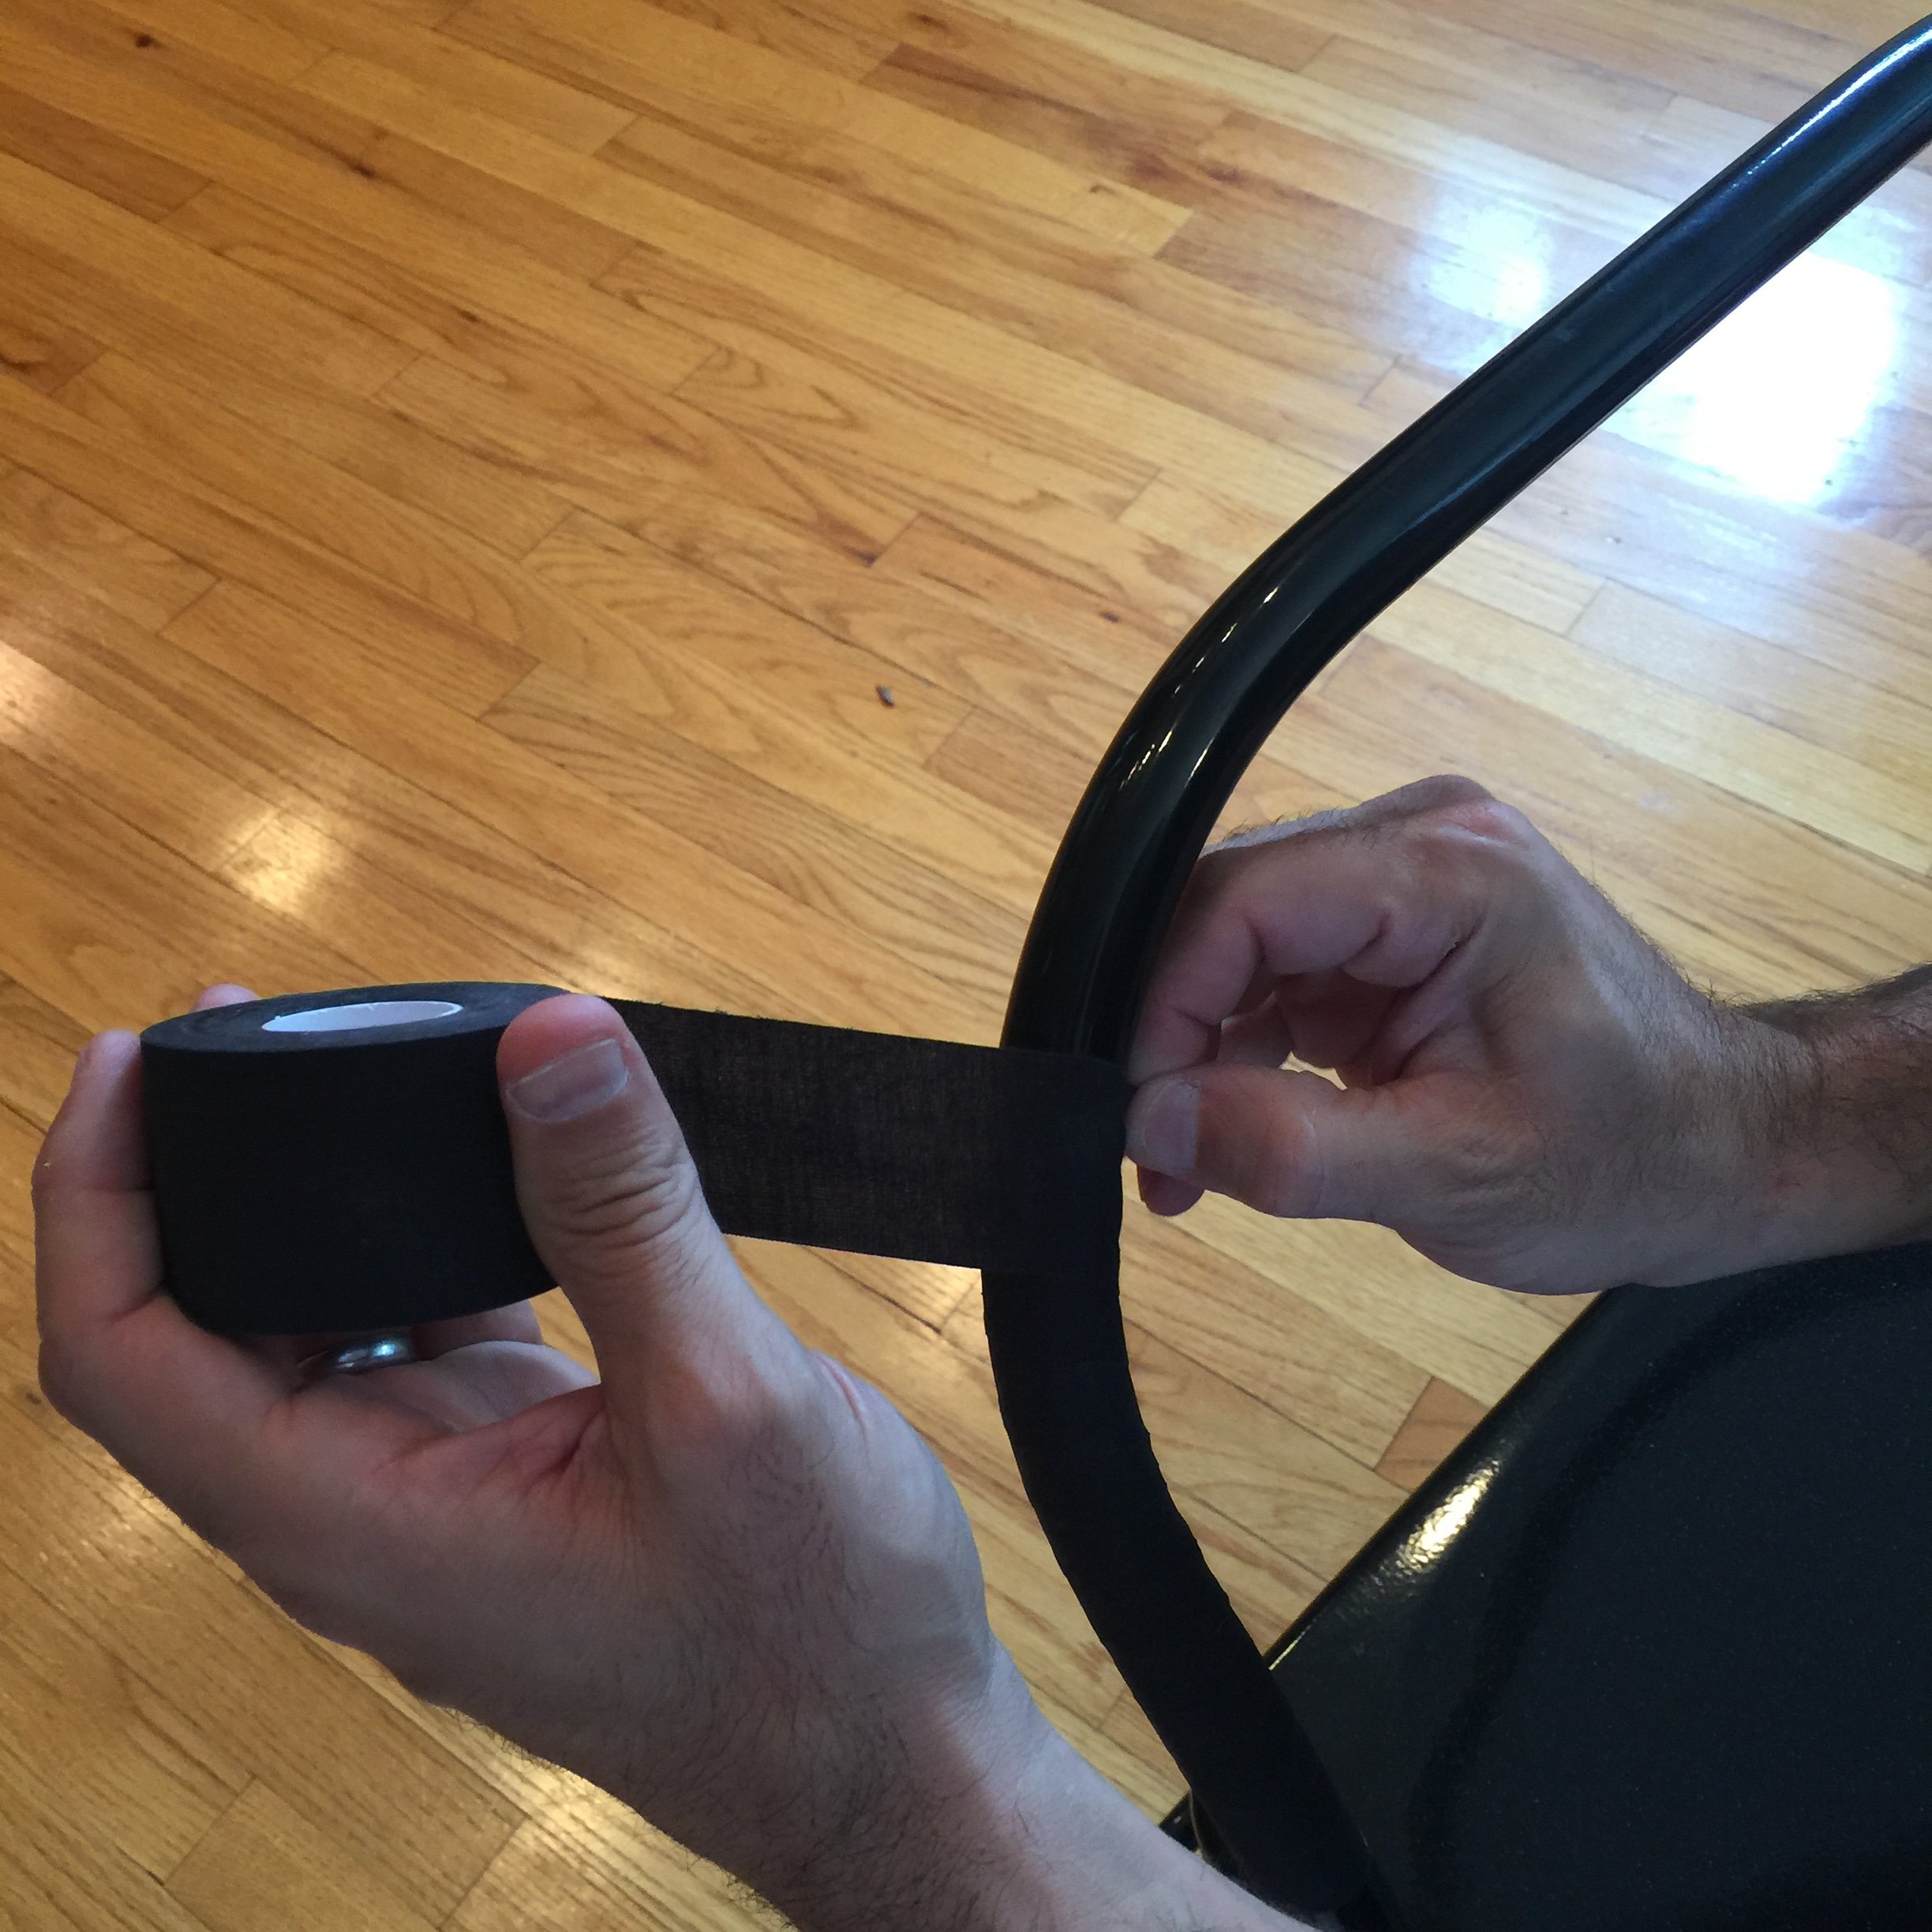 Once again...my husband was SUPER helpful! It's a little tricky to keep the tape smooth around the corners...but it's stretchy, so it wasn't TOO bad...my husband is WAY more of a perfectionist about these things...so he was the best one for the job!Voilà! My yoga chair is ready for use!
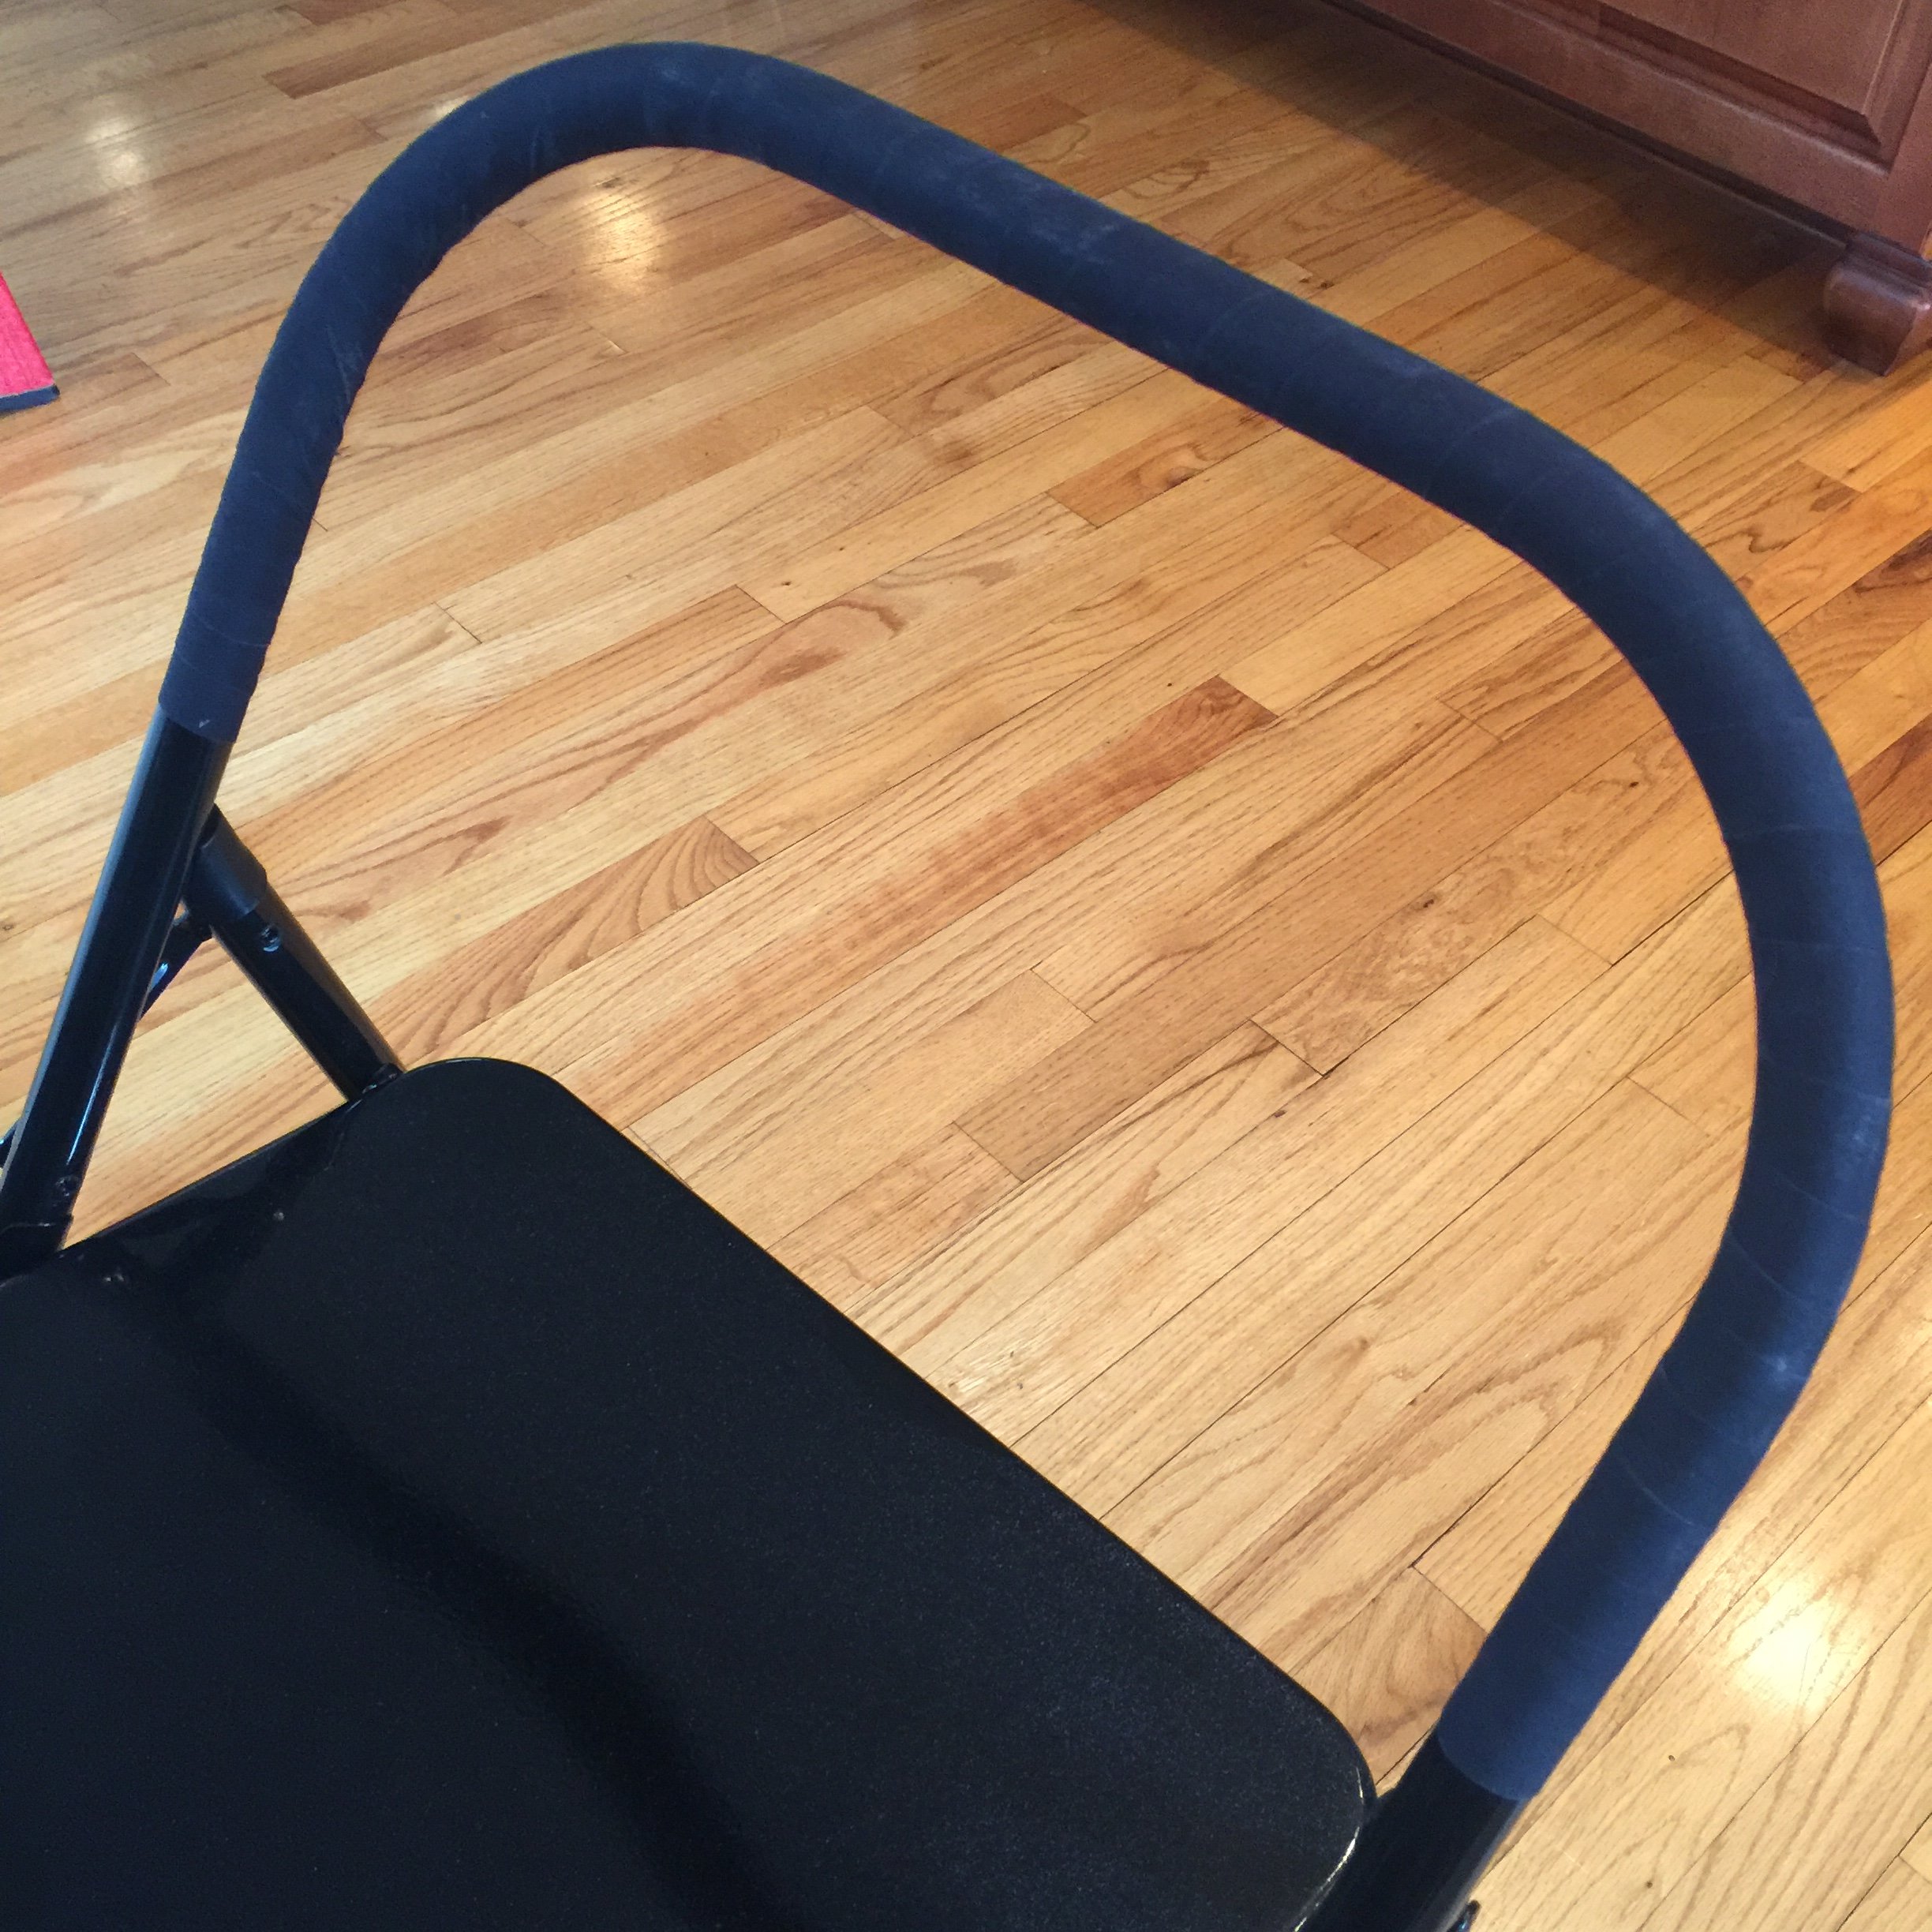 all i
all i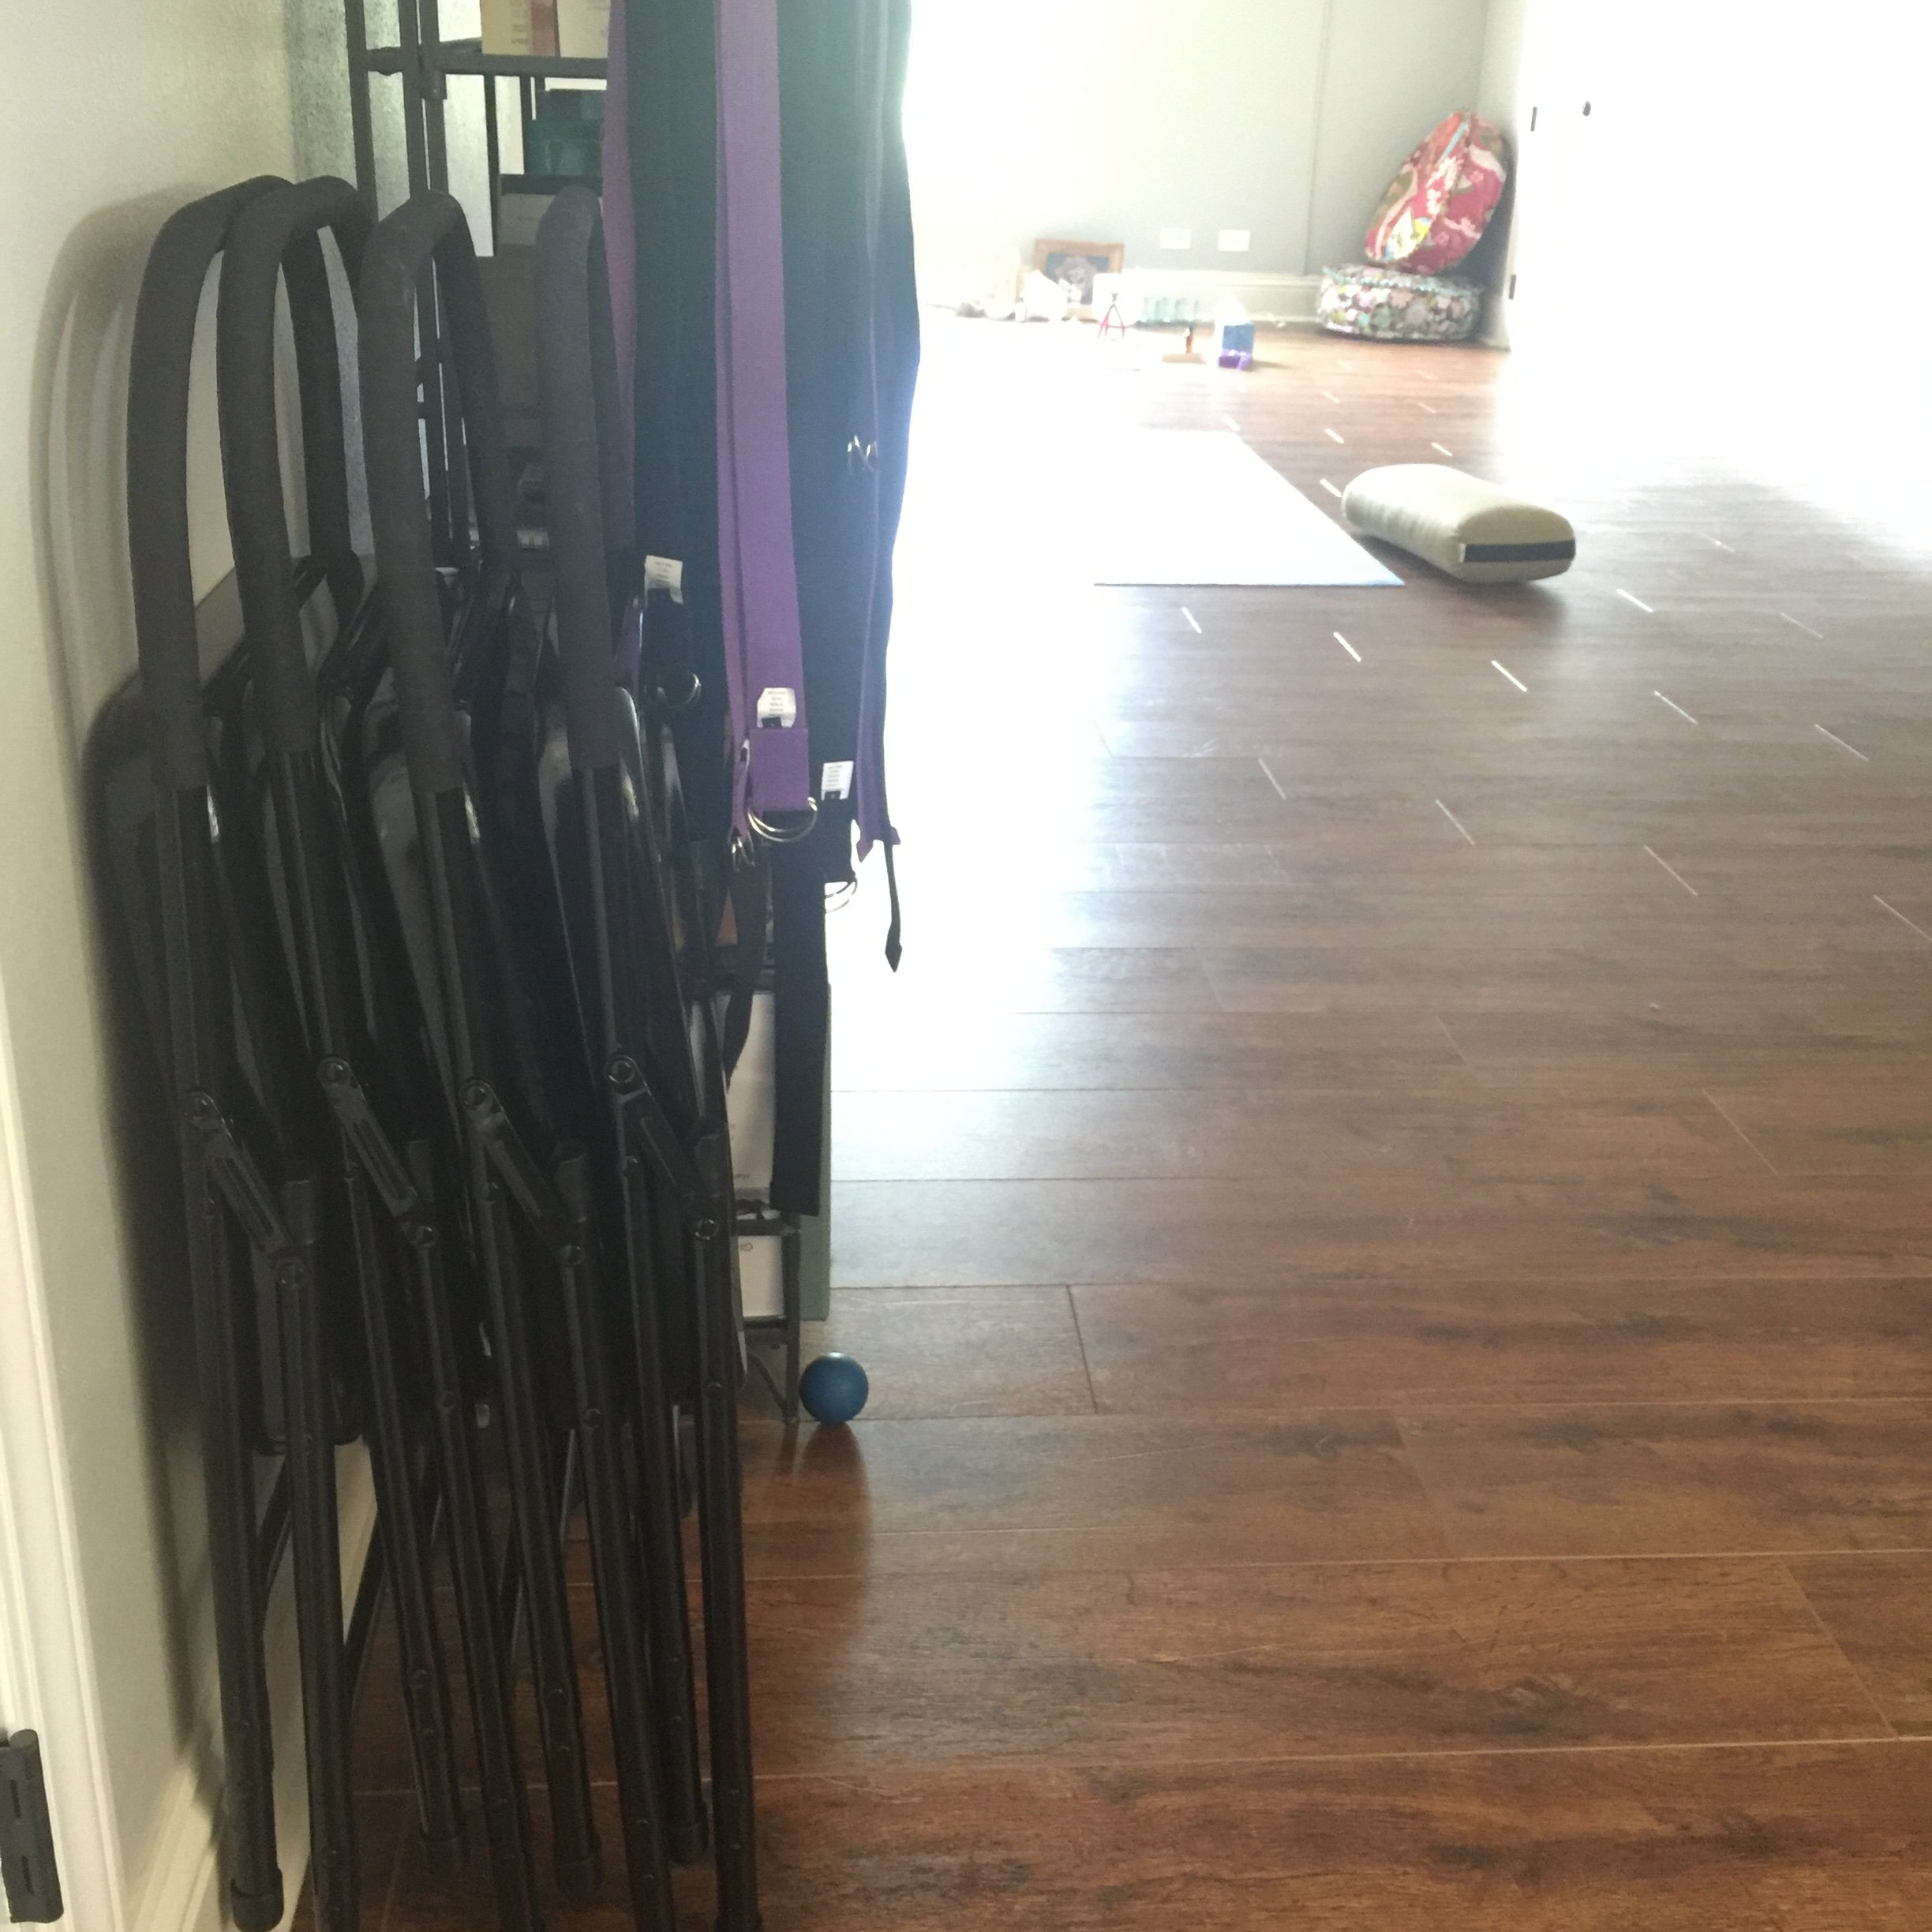 All in a neat little stack in my studio..ready to use!!Let me know if you have any questions!